Several list pages are present in the application. The following features are available in order to enhance the results’ consultation: pagination, sorting and filtering.
3.5.1.1 Pagination
The number of results per page is dynamically limited to a maximum configurable number (10, 20, 50, 75 or 100). A navigation bar allows navigating among the different pages of results.
The user has two possibilities to reach a page:
Select the page number directly in the navigation bar: each page number is a normal hyperlink. A maximum of five pages are shown: the actual page, the previous two and the next two pages (if any). The link of the current page is not active.
Browse with the navigation hyperlinks. The user can move to the previous or next page respectively.
Here below a screenshot of the pagination bar.
Pagination
3.5.1.2 Sorting
All lists provide the possibility to sort the content in ascending or descending order according to a sorting criterion. In particular, criteria related to a code list are sorted according to the code and not the value due to the definition of a code list.
3.5.1.3 Filtering & wildcards
When filtering data, the user can search with the use of wildcards. Wildcards are special characters that can stand in for zero as well as for multiple characters. Both the asterisk (*) and the percent (%) symbols match any number of characters, and therefore a query for which the Applicant EORI number is BE* (or BE%) will retrieve all Applications having an Applicant EORI number starting with "BE". When wildcards search is available for a specific criterion on a list page, this is indicated in the corresponding tooltip.
Filtering is case-insensitive for all autocomplete, multiselect and text fields. The values are displayed in alphabetical order.
Default filtering is applied on the list pages in order to display the active cases only. A default filtering is applied on the following pages:
Applications List Page: Registered, Accepted and Sent statuses are displayed;
Authorisations List Page: Active, Suspended, Pending statuses are displayed;
Notifications List Page: New and Unread statuses are displayed.
Note that the filtering can be removed or modified to consult other possible statuses.
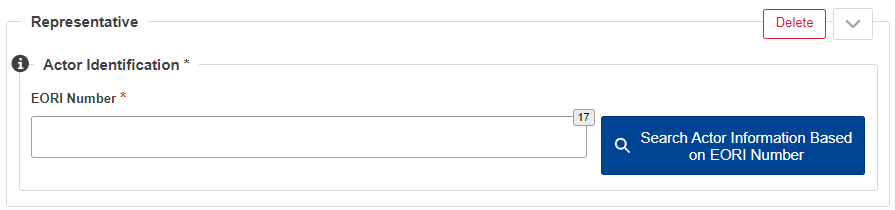
3.5.2 Actor information retrieval
An actor represents a user, i.e., a Trader. An actor is identified by his EORI number, his name and his address. The “Actor” search functionality is foreseen in order to avoid that the same actor must be encoded several times in the system. Each time the actor EORI Number is requested in a form, a search can be performed to complete or update other actor information of the form based on the EORI Number.
Search Actor Information Based on EORI Number
3.5.3 Attachments
The application allows the user to upload, remove and view attachments. These functionalities are available in each page which contains some attachments.
3.5.4 Mass Entry of Data
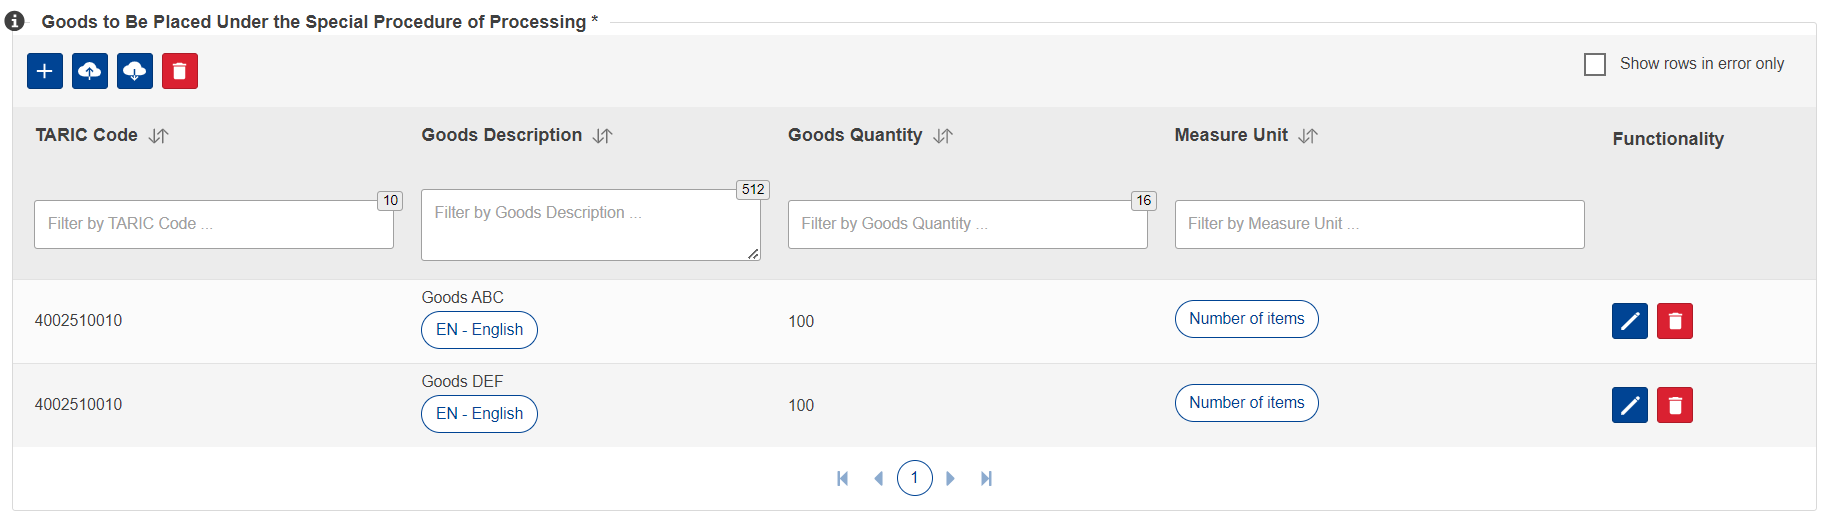
The application allows the user to upload data with high repeatability in a separate file. Some data groups, like Location of Goods, can contain more than 1000 records. It is more convenient to enter such data in a separate file and subsequently upload it into the CDMS system. For this reason, special excel forms are prepared, which should be filled-in with the relevant data. Once the excel form is filled with data, it must be saved and uploaded in the appropriate Application / Authorisation form.
After the upload, the data from the excel file is displayed in the user interface directly at the place of the relevant data group. Additional fields related to the goods (e.g., TARIC Additional Code, National Additional Code) can be seen by clicking on the “View/Edit” button, as displayed in the figure below.
Mass Upload for Goods to Be Placed Under the Special Procedure of End Use Data Group
It is worth noting that, inside a specific good, some data elements are repeatable according to the legislation, e.g., for each “Goods to Be Placed Under the Special Procedure of End Use”, several “Value of Goods” can be entered. As a list of lists cannot be handled with an excel file, it has been decided to give the possibility to the user to enter two values (at most) in the excel form. If the user wishes to enter more values for repeatable fields, this can be done through the user interface, after having imported the excel file.
The uploaded data is displayed in table format. The number of results per page is limited to a maximum configurable number. A navigation bar allows navigating among the different pages of results. The table provides the possibility to filter and sort the results on all columns present in the table.
In case of error, the user is notified about this fact. The information contains the description of the error and the record number in the excel file. The errors have to be corrected in the excel file and subsequently re-uploaded into CDMS. The data from the previous upload is automatically overwritten. Moreover, the user has the possibility to only display the rows in error by selecting the “Show rows in error only” radio button.
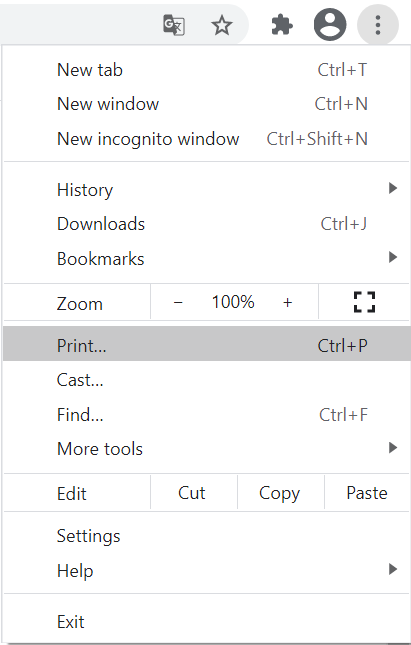
For all data, it is possible to print the visualisation page using the browser’s printing capabilities. You can find the print functionality on the top right corner of the page. It looks like this:
Print functionality (standard browser capability)
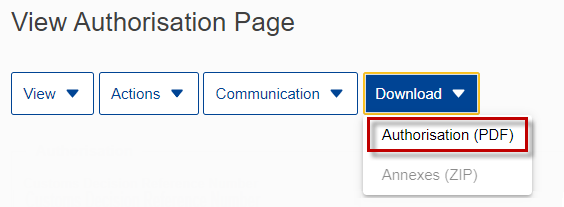
Additionally, it is possible to generate a printable version (in the form of a PDF document) of an Application or an Authorisation by means of the "Print" functionality. The PDF naming will follow the pattern YYYYMMDD-[ReferenceNumber] where the date is the current date and the reference number is the one associated with the printed Application / Authorisation. Only the following characters from the reference number are kept in the filename: letters, numbers, spaces, hyphen and underscores. This print page is notably accessible from the "View Application" and "View Authorisation" pages, in the "Download" drop-down button.
Furthermore, the PDFs exported from the “View Authorisation From Notification Or Application Page” contain a watermark. The watermark text corresponds to “Draft” and the translation of this watermark is available. Additionally, the print date is added in the footer of all generated PDFs in the following format: “PDF created on [DD-MM-YYY].
Note that when printing an Application / Authorisation, the related process data and internal notes are not exported.
Also note that it is possible to download the annexes in a zip file by clicking on the "Annexes (ZIP)" button in the "Download" drop-down button. Here below a screenshot of the print button, in the "Download" drop-down button. Authorisation (PDF) button (PDF creation, from the "View Authorisation Page")
3.5.5.1 Print of long forms
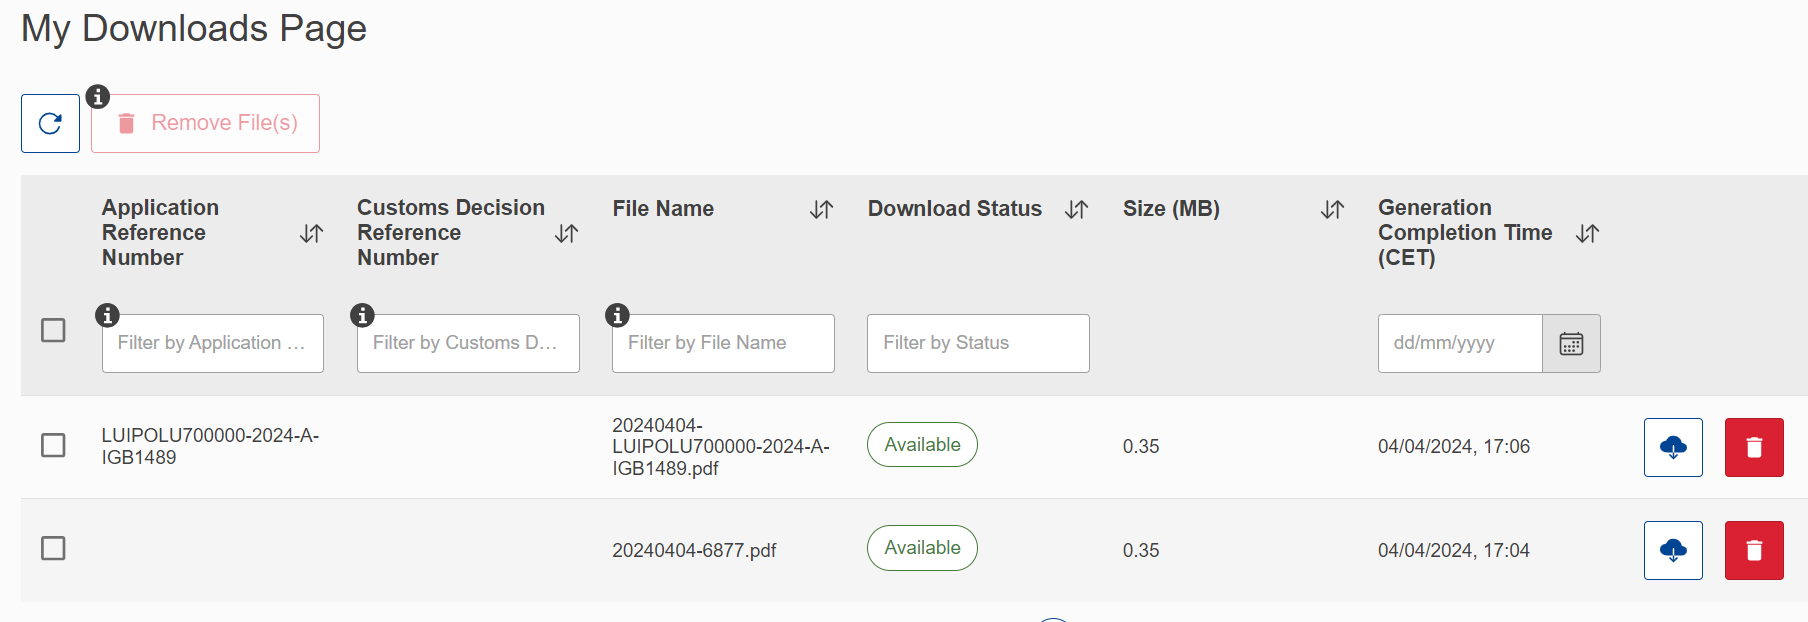
If the generation of the PDF takes more than the configured time limit, the user will be informed that the generation is still ongoing and that it will be available for download on the “My Downloads" page (accessible from the TP Menu > User Account > My Downloads).
The user can download the PDF once it has been generated and its status is "Available".
Note that the generation of the PDF may take several minutes.
The files can be manually removed, and they are subject to be eliminated by the system after 24 hours.
Here below a screenshot of the "My Downloads" Page.
My Downloads Page
3.5.6 View Page
The view page allows the user to access various information in read-only mode. Note that, by definition, read-only information is only displayed when the value of the related field exists in the database.
3.5.7 Application and Authorisation Timeline
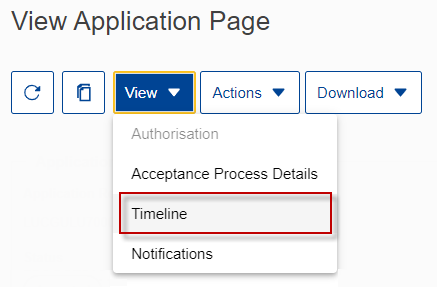
The Application or Authorisation Timeline aggregates all the notifications, related to an Application or Authorisation, received by the trader. The timeline is accessible from the View Application or Authorisation page, by clicking on the "Timeline" button, in the "View" drop-down button (see figure below).
"Timeline" button (in "View Application" page)
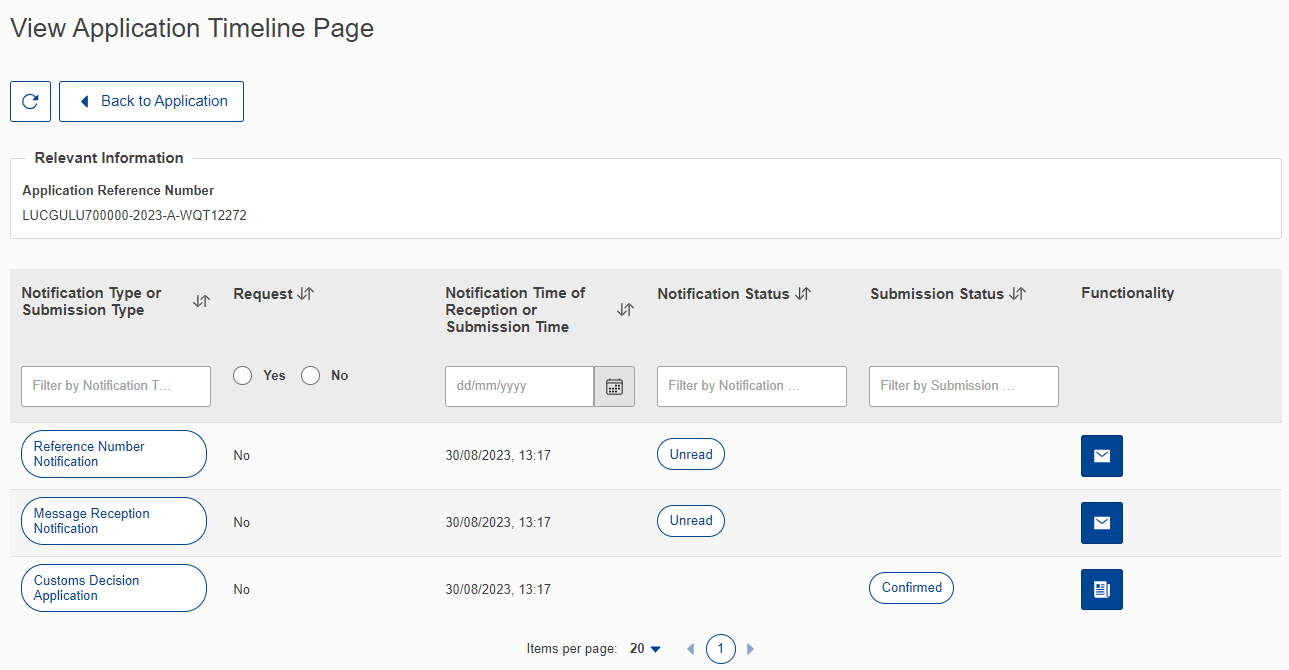
The user is then directed on the timeline page (see figure below).
Application Timeline (from the "View Application" page)
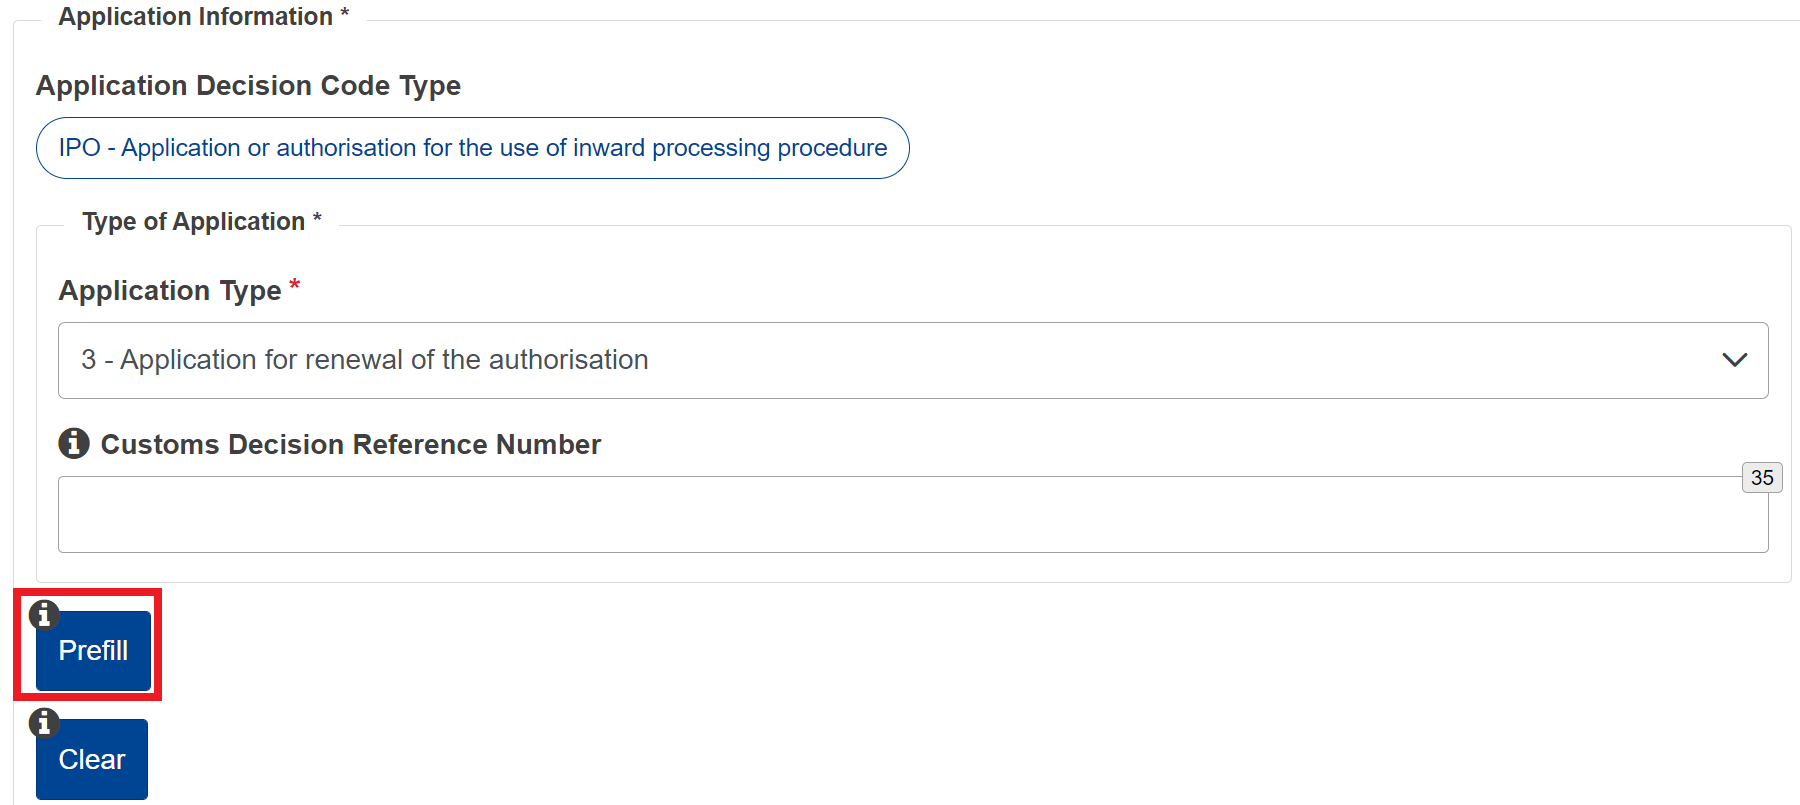
3.5.8 Prefill Functionality
The prefill functionality can be used to avoid encoding information that is already known by the system.
Here below, an example of the prefill functionality.
Prefill button (from the "Application Content Creation Page")
Each prefill is associated with a clear function. By clicking on the "Clear" button, all data which is subject to the prefilling will be deleted.